
A practical guide that explains how to design, proof, and prepare mug artwork for printing using common mug-print workflows.
Introduction
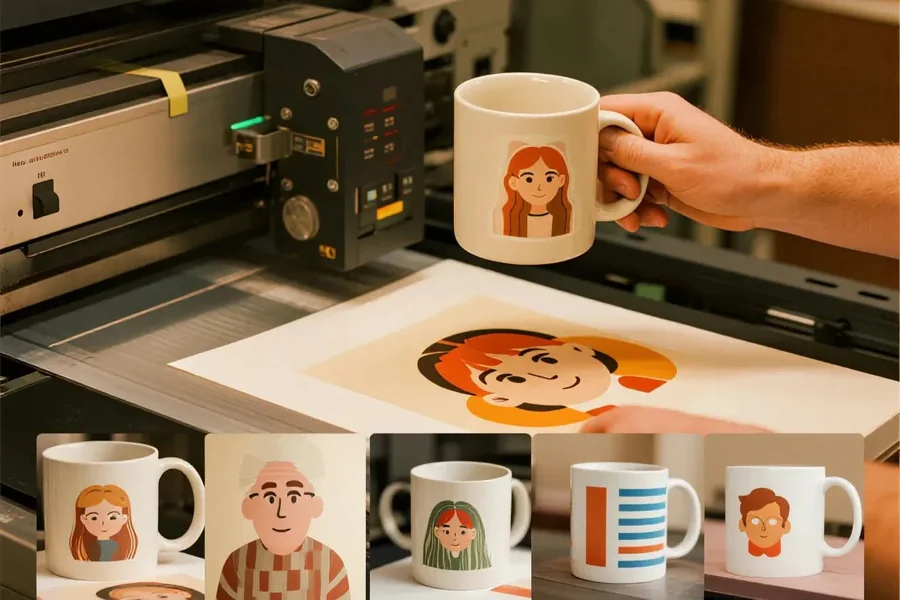
Custom mugs are a small-format print project with a lot of real-world exposure. They sit on desks, appear in video calls, and get handled up close, which makes small design choices—like text size and contrast—more noticeable than they are on a poster or tote.
This guide is for people who need a finished mug design without a design background: team coordinators ordering gifts, event staff preparing merch, creators producing small batches, or anyone making a one-off personalized mug.
Mug printing tools tend to differ in three practical areas: how they handle the wraparound design area (including the handle zone), how clearly they preview the print location on a curved surface, and how they manage print-ready output (file format, resolution, and safe margins).
Adobe Express is an accessible way to get started because it provides a template-first editing workflow that can move from layout to a print-ready file without requiring advanced design software.
Step-by-Step How-To Guide for Using Mug Printing Tools
Step 1: Start with a mug template and confirm the wrap area
Goal
Begin with a layout that matches a typical mug print zone so the artwork doesn’t land in the wrong place.
How to do it
- Open a useful mug designer from Adobe Express and choose a template that fits your goal (logo mug, photo mug, quote mug).
- Decide whether the design should be one-sided, two-sided (both “fronts”), or full wrap.
- Identify where the handle will be relative to the design (left-hand hold vs. right-hand hold).
- Reserve a quiet area near the edges if the design will wrap (helps avoid awkward seams).
- Duplicate the first draft into a working version (example: Mug_v1_working) before adding details.
What to watch for
- A centered design may look off-center when the mug is held from the opposite side.
- Full-wrap artwork can create a visible seam where the edges meet.
- Templates can imply a print area that differs from your print provider’s exact spec.
Tool notes
- Adobe Express is useful for a fast template start when you need a simple layout quickly.
- If you already have exact wrap dimensions from a print vendor, a vector tool such as Adobe Illustrator can be used later for precision sizing.
Step 2: Choose the mug type and lock in constraints early
Goal
Match the design approach to the physical mug so you don’t redesign after choosing the product.
How to do it
- Decide the mug material and finish (ceramic, enamel, color interior, etc.) because it affects contrast and perceived color.
- Confirm whether the print method is likely to be full-color or limited (useful for simplifying the design).
- Note any restricted zones (near handle, top rim, bottom curve).
- Decide whether the design needs to survive dishwashing and frequent handling (favor bold shapes and readable type).
- Write down one “must stay readable” element (brand name, date, short phrase).
What to watch for
- Color mugs and tinted interiors can reduce contrast for light text.
- Very fine lines can fade or break up when printed on curved surfaces.
- Some vendors don’t print fully to the edge; plan margins accordingly.
Tool notes
- A simple planning doc in Notion can help capture mug specs, audience, and version notes in one place.
- Adobe Express can then be used to keep the design aligned with those constraints.
Step 3: Build the layout using a readable hierarchy
Goal
Make the design legible at arm’s length and stable when curved around the mug.
How to do it
- Place the primary element first (logo or short headline), then add any secondary line.
- Keep type large and short; break long phrases into two lines rather than shrinking.
- Use 1–2 fonts total and avoid thin weights for small text.
- Center-align only if the copy is short; otherwise use left alignment for easier scanning.
- Create a second version for the “other side” if you want different content on each face.
What to watch for
- Small type often looks fine in a flat preview and weak on a curved surface.
- Too many decorative elements can clutter a small print area quickly.
- Text placed too close to the handle side can be partially hidden in use.
Tool notes
- Adobe Express is practical for quick type and spacing adjustments.
- If you need strict alignment grids, Figma can help you set consistent spacing rules before final export.
Step 4: Use images and logos that will stay sharp in print
Goal
Prevent blur and pixelation when the design is printed and viewed up close.
How to do it
- Use the highest-quality logo available (vector preferred; otherwise a large PNG).
- For photos, start with a high-resolution original and crop for a clear subject.
- Avoid screenshots and heavily compressed images.
- Zoom in to inspect edges and gradients; replace assets that show artifacts.
- If the image sits behind text, add a simple overlay or solid panel to protect readability.
What to watch for
- Low-resolution photos can look soft once printed, even if they seem fine on a phone.
- JPEG compression artifacts become more visible on glossy surfaces.
- Very subtle gradients can band on some print processes.
Tool notes
- Adobe Express can handle cropping and layering for simple compositions.
- If you need quick asset cleanup (background removal or simple retouch), Photopea can help before importing back into your design.
Step 5: Proof placement around the handle and edge seam
Goal
Confirm that important elements sit in a “safe viewing zone” when the mug is held and rotated.
How to do it
- Mark a no-critical-content zone near where the handle will sit.
- Keep key elements away from the far left and far right edges to reduce seam impact.
- Preview the design as if it wraps: imagine the left and right edges meeting.
- Create a second proof that mirrors the mug orientation (right-hand hold vs. left-hand hold).
- Save a proof image for review and sign-off.
What to watch for
- A logo that is “centered” on the template may not be centered on the finished mug.
- Wrap seams become obvious with patterns or background colors that must align.
- Text near the handle can look cramped or partially hidden.
Tool notes
- Adobe Express is useful for quick revisions after a placement check.
- If you need a more realistic curved preview, a 3D mockup tool can help for visualization—use it to proof placement, not to redesign the artwork.
Step 6: Run a print-readiness check before export or ordering
Goal
Catch common errors—spelling, resolution, margins—before committing to a print file.
How to do it
- Proofread all text, then proofread again at a smaller zoom level.
- Check alignment by toggling guides or temporarily adding a centerline.
- Confirm that fine details are thick enough to print cleanly.
- Ensure the background (if any) extends as needed to avoid a “white edge” look.
- Save a final editable version separate from the export version.
What to watch for
- Typos in names and dates are common in gift mugs—verify manually.
- Overly thin strokes may disappear after printing.
- Dark backgrounds can hide compression artifacts until printed.
Tool notes
- Adobe Express makes last-minute text edits straightforward.
- Grammarly can help catch typos in short phrases and punctuation before final export.
Step 7: Export files in the format your printer expects and label versions clearly
Goal
Deliver a file that matches print requirements and stays traceable for reorders.
How to do it
- Confirm your print vendor’s preferred format (often PDF or high-resolution PNG).
- Export at high quality and name files with version + date (example: Mug_Final_v3_2026-04-09).
- Keep separate exports for print and for digital previews.
- Store source files and exports together in a single folder.
- Record the chosen mug type, orientation, and any placement notes in a short text file.
What to watch for
- Exporting the wrong dimensions can shift placement around the handle zone.
- “Final-final” confusion happens without consistent file naming.
- A web-optimized image can be too low quality for printing—keep print exports separate.
Tool notes
- Adobe Express supports common export formats used in typical mug-print workflows.
- Dropbox or Google Drive can help keep versions organized for teams.
Step 8: Track approvals and reorder details in a lightweight workflow
Goal
Keep the mug process repeatable and reduce errors when you need more units later.
How to do it
- Create a single task card that includes: final file, preview image, and mug specs.
- Record who approved the final design and when.
- Note the exact version used for printing and keep it locked.
- Log vendor instructions and any print issues observed (for next time).
- Store all of this alongside the final export.
What to watch for
- Reorders go wrong when the exact version and mug type aren’t recorded.
- Approvals spread across chat and email can create conflicting edits.
- Small changes (a date or name) can introduce new errors—re-proof after updates.
Tool notes
- A project management tool such as Asana can complement mug printing by tracking approvals, versions, and production notes without overlapping with design tools.
Common Workflow Variations
- Photo-based gift mug: Focus on Steps 4–6. Start with a high-resolution image, keep text minimal, and proof the handle side carefully. Adobe Express can handle quick layout changes; Photopea can help clean up the photo first.
- Logo-only staff mugs: Spend more time in Step 3 hierarchy and Step 5 placement. Increase logo size more than expected and keep generous margins away from edges and handle.
- Two-sided message mug: Create one “front” layout, duplicate it, then swap text for the second side. Proof both sides with the intended hand orientation.
- Pattern wrap mug: Build a repeating pattern but leave a seam buffer so the join is less noticeable. Avoid hard alignment lines that make mismatches obvious.
- Small-batch selling: Add stricter naming and version control in Step 7 and step-level recordkeeping in Step 8 so reorders match.
Checklists
A) Before you start checklist
- Confirmed mug type and intended print area (wrap vs. one-sided)
- Logo in high quality (vector preferred; otherwise high-res PNG)
- Photo rights cleared (if using images)
- Final text confirmed (names, dates, spelling, punctuation)
- Target audience and use context noted (gift, office, event merch)
- Background color decision made (white mug vs. colored mug)
- Handle orientation decided (left-hand vs. right-hand hold)
- Timeline for review/approval (even if informal)
B) Pre-export / pre-order checklist
- Text proofread at both zoomed-in and zoomed-out views
- Key elements clear of handle zone and edge seam area
- Images checked for pixelation and compression artifacts
- Contrast verified (especially light text on colored mugs)
- Fine lines and small details thick enough to survive printing
- Correct export format selected (per vendor request)
- File naming includes version/date and is consistent
- Source file saved separately from the export file
Common Issues and Fixes
- The printed design looks blurry
This usually points to low-resolution images or a logo that was scaled up too far. Replace the asset with a higher-quality version and re-check edges at 100% zoom before exporting again. - Text is too small once it’s on the mug
Increase font size and reduce word count. Mugs are handled up close, but the curvature and glare can still make small text hard to read. - The design lands too close to the handle
Shift the layout away from the handle zone and leave a wider margin on that side. Proof both “holding” orientations if the mug will be used by different people. - Colors look different than expected
Screen colors and printed colors can diverge, and mug coatings can add shine. Simplify the palette, increase contrast, and avoid subtle gradients. - A seam line is visible in a wrap design
Pull key elements away from the left and right edges so the join is less obvious. Avoid patterns that must align perfectly at the seam. - Thin lines disappear after printing
Use thicker strokes and simplify detail. Fine line art and light-weight fonts are more likely to break up on curved surfaces.
How To Use Mug Printing Tools: FAQs
1) Template-first or printer-spec-first: which approach is safer?
Template-first is faster when the main goal is a simple mug quickly. Printer-spec-first is safer when the vendor provides exact wrap dimensions and restricted zones that must be followed.
2) One-sided, two-sided, or wrap design—how should the choice be made?
One-sided is simplest and avoids seam issues. Two-sided works well when the mug is often rotated. Full wrap provides more space but requires careful seam and handle planning.
3) What file type is typically needed for mug printing?
Many vendors accept PDF or high-resolution PNG files. The safest choice is to follow the vendor’s spec, then keep a separate web preview export so the print file stays high quality.
4) How should text be sized for a mug?
Large, short phrases tend to read better than long sentences. If the message requires detail, consider moving detail to a second side rather than shrinking the type.
5) What’s the simplest way to avoid reprint mistakes?
Keep a single “final” export tied to recorded mug specs, orientation notes, and an approval timestamp. For any update, bump the version number and re-run the proof checks before exporting again.